This part fits the vehicle you selected:
My Vehicle: 2HNYD18852H516449 2002 Acura MDX 5 Door PREM (PKG-NAV); KA 5AT
Change VehicleThe vehicle options this part fits:
- Mfg.Origin: CAN
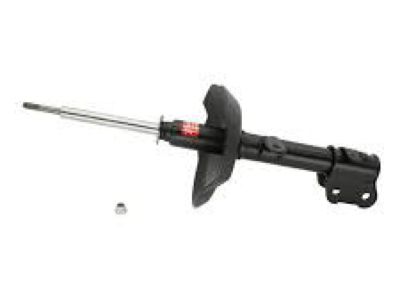
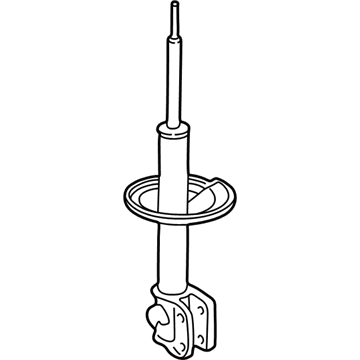
Acura 51606-S3V-305 Front Left Suspension Strut
2001-2002 Acura MDX 51606S3V305

- Part DescriptionDamper Unit, Left Front
- PositionFront Driver Side
- Replaces51606-S3V-A02, 51606-S3V-A03, 51606-S3V-A01, 51606-S3V-A04
- ManufacturerAcura
This part fits the vehicle you selected:
2HNYD18852H516449 2002 Acura MDX 5 Door PREM (PKG-NAV); KA 5AT
The vehicle options this part fits:
- Mfg.Origin: CAN
$190.12 MSRP: $271.51 1
You Save: $81.39 (30%)
Ships in 1-3 Business Days
Product Specifications
| Brand | Genuine Acura |
| Manufacturer Part Number | 51606-S3V-305 |
| Part Description | Damper Unit, Left Front |
| Other Names | Strut |
| Item Dimensions | 29.6 x 12.0 x 11.4 inches |
| Item Weight | 7.70 Pounds |
| Position | Front Driver Side |
| Condition | New |
| Fitment Type | Direct Replacement |
| Replaces | 51606-S3V-A02, 51606-S3V-A03, 51606-S3V-A01, 51606-S3V-A04 |
| Manufacturer | Acura |
| SKU | 51606-S3V-305 |
| Warranty | This genuine Acura part is guaranteed by Acura's factory warranty. |
| Shipping & Return | Shipping Policy Return Policy |
Warning: California’s Proposition 65
Customer Questions & Answers
- Q:Is this the correct part for my vehicle? Posted by AcuraPartsWarehouse Specialist
- A:You can Select Your Vehicle to check if 51606-S3V-305 fits your vehicle.Posted by AcuraPartsWarehouse Specialist
- Q:How do you remove a strut? Posted by Customer
- A:To remove the strut, start by loosening the wheel lug nuts and raising the vehicle on jack stands. Remove the wheel and disconnect the stabilizer bar link and brake hose bracket from the strut. Detach the ABS speed sensor wiring harness by removing the clamp bracket bolt. Mark the relationship of the strut to the knuckle and remove the strut-to-knuckle nuts and bolts. Separate the strut from the steering knuckle, being careful not to overextend the inner CV joint. Remove the access covers from the cowl cover and mark the stud closest to the front of the vehicle. Support the strut and spring assembly and remove the three strut upper mounting nuts. Remove the assembly from the fender well, making sure to mark the struts as left or right if both are being removed. To inspect the strut, check for leaking fluid, dents, cracks, and other damage. Inspect the coil spring for chips or cracks in the coating and the spring seat for cuts or deterioration. If any issues are found, proceed to the strut disassembly procedure. To install the strut, guide the assembly into the fender well and insert the three upper mounting studs through the holes in the shock tower, placing the marked stud closest to the front. Install the nuts to secure the strut. Slide the steering knuckle into the strut flange and insert new mounting bolts, tightening them to the specified torque. Reattach the brake hose bracket, speed sensor wiring harness bracket, and stabilizer link. Install the wheel, lower the vehicle, and tighten the lug nuts. Finally, tighten the three upper mounting nuts to the specified torque and have the front wheel alignment checked and adjusted if necessary.Posted by AcuraPartsWarehouse Specialist
- Q:How to disassemble and reassemble a strut and coil spring assembly? Posted by Customer
- A:If the struts or coil springs show signs of wear such as leaking fluid, loss of damping capability, or chipped, sagging, or cracked coil springs, it is important to explore all options before starting any work. The strut/shock absorber assemblies cannot be serviced and must be replaced if there is a problem. However, you may be able to find strut assemblies complete with springs on an exchange basis, which can save time and effort. Before disassembling your vehicle, make sure to check the cost and availability of parts. To begin the disassembly process, remove the strut and spring assembly and mount it in a vise, taking care to protect the unit from damage. Use a spring compressor to relieve pressure from the upper spring seat, ensuring that the spring is loose by wiggling it. Hold the strut piston rod with an Allen wrench and unscrew the thrust bearing retaining nut with a box-end wrench. Remove the nut and upper mount, laying out the parts in the order they were removed. Inspect the bearing in the suspension support for smooth operation and replace if necessary. Check the rubber portion of the upper mount for cracking or deterioration and replace if needed. Remove the upper spring seat and upper insulator from the damper shaft, checking for cracking or hardness in the spring seat and replacing if necessary. Carefully lift the compressed spring from the assembly and set it aside. If disassembling both struts, mark the springs as left and right to avoid mixing them up. Remove the dust cover plate and dust cover, then slide off the rubber bump stop and check for deterioration, replacing if needed. To reassemble, extend the damper rod and install the rubber bump stop, dust cover, and dust cover plate. Place the compressed coil spring onto the lower seat of the damper, ensuring the end fits into the recessed portion of the lower seat. Install the upper insulator and spring seat, followed by the bearing and suspension support. Install the washer and nut, tightening it to the specified torque. Remove the spring compressor tool and install the strut/spring assembly.Posted by AcuraPartsWarehouse Specialist
- Q:How to replace the rear shock absorbers on Acura MDX with active damper control? Posted by Customer
- A:On 2007 Acura MDX models with active damper control, it is recommended to consult an authorized dealership or qualified repair facility for rear shock absorber replacement. Before starting the removal process, loosen the rear wheel lug nuts and secure the front wheels with chocks. Then, raise the rear of the vehicle and support it on jack stands. Remove the rear wheels. For Pilot and MDX models, support the lower arm B with a floor jack placed under the coil spring pocket. Remove the stabilizer link, ABS speed sensor, and wire harness from the lower arm B. Remove the shock absorber upper mounting bolt and the shock absorber lower mounting nut and washer. If necessary, compress the shock and remove it. For Ridgeline models, special tools are required to compress the shock/coil spring assembly, so it is recommended to have the rear shocks installed by an authorized dealership or qualified repair facility. Remove the lower control arm B and the three flange bolts from the shock/coil spring assembly upper mounting base. Lower the shock/coil spring assembly from the vehicle. To install the shock absorber, reverse the removal procedure. For all models, make sure to tighten the mounting fasteners to the specified torque. Repeat the procedure for the other rear shock absorber. Finally, install the wheels and lug nuts, lower the vehicle, and tighten the lug nuts to the specified torque.Posted by AcuraPartsWarehouse Specialist
If you have any questions about this product, please don't hesitate to ask us. We will be happy to help you!
Why choose Acura Parts Warehouse
- Dedicated Service
Your complete satisfaction is our #1 goal
- Lowest Prices
Best deals on genuine OE parts from dealerships
- Fast Delivery
Orders are processed and delivered promptly

