×
- Hello
- Login or Register
- Quick Links
- Live Chat
- Track Order
- Parts Availability
- RMA
- Help Center
- Contact Us
- Shop for
- Acura Parts
- Acura Accessories
My Garage
My Account
Cart
Genuine 2004 Acura TL Engine
- Select Vehicle by Model
- Select Vehicle by VIN
Select Vehicle by Model
orMake
Model
Year
Select Vehicle by VIN
For the most accurate results, select vehicle by your VIN (Vehicle Identification Number).
1 Engine found


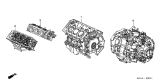
2004 Acura TL General Assembly (Dot)
Part Number: 10002-RDA-305$2561.69 MSRP: $6879.15You Save: $4317.46 (63%)Ships in 1-2 Business DaysProduct Specifications- Other Name: Short Block
- Replaces: 10002-RDA-A01, 10002-RDA-X00, 10002-RDA-A00, 10002-RDA-A02, 10002-RDA-X01
- Item Weight: 101.80 Pounds
- Item Dimensions: 29.8 x 28.8 x 26.3 inches
- Condition: New
- Fitment Type: Direct Replacement
- SKU: 10002-RDA-305
- Warranty: This genuine part is guaranteed by Acura's factory warranty.
2004 Acura TL Engine
If you find yourself requiring new genuine 2004 Acura TL Engine, consider paying us a visit. We carry a vast inventory of OEM 2004 Acura TL Engine, offered at highly competitive prices and superior quality, all with a manufacturer's warranty. Additionally, we take pride in our first-class customer service and speedy delivery.
2004 Acura TL Engine Parts Questions & Experts Answers
- Q: Is Engine Removal a Challenging Task for the Do-It-Yourself Mechanic on an 2004 Acura TL?A: Engine removal on these models is a challenging task, particularly for the do-it-yourself mechanic. Due to the vehicle's design, the engine and transaxle must be removed as a unit from the bottom, necessitating a frame-contact type vehicle hoist for safe support. Begin by parking the vehicle on the hoist and engaging the arms with the jacking points, raising them until they contact the vehicle without lifting the wheels off the ground. With assistance, disconnect the hood struts and raise the hood, then relieve fuel system pressure and disconnect the negative battery cable. Remove the engine cover and compartment covers, followed by the air filter housing and intake duct. Disconnect the accelerator and cruise control cables, remove the battery and tray, and disconnect the main engine harness connectors. Label and disconnect all vacuum lines, emissions hoses, and ground straps, ensuring to mark both ends of each connection. Disconnect the fuel line(s), loosen the front wheel lug nuts, and raise the vehicle to remove the wheels and loosen the driveaxle/hub nuts. Remove the drivebelts, detach the power steering pressure hose and pump, drain the cooling system, and detach the heater hoses and radiator hoses. Remove the cooling fan(s) and radiator, support the air conditioning compressor, and work inside the driver's compartment to remove the lower trim panel and pinch bolt from the intermediate shaft. Raise the vehicle to remove the engine lower splash shield, drain the engine oil and transaxle fluid, detach the stabilizer bar links and tie-rod ends, and remove the driveaxles. Disconnect the shift cable and power steering return hose, unplug the electrical connector from the power steering pressure switch, and detach the exhaust pipe. Remove the front and rear engine mounts, and for automatic transmission models, remove the torque converter cover and bolts. Support the engine from above with chains, ensuring balanced support, then roll the hoist into position and take up slack. Unbolt the left transaxle mounts, rear engine mount, and carefully mark the subframe's position. Support the subframe with floor jacks, remove the mounting bolts, and lower it to the floor. Unbolt the passenger's side engine mount, check for any remaining connections, and slowly lower the engine/transaxle assembly to the floor. Once on the ground, disconnect the hoist and raise the vehicle until it clears the powertrain assembly. Reconnect the chain, raise the engine and transaxle, and support them securely while unbolting the transaxle from the engine. Finally, reconnect the lifting chain to the engine and attach it to an engine stand. For installation, reverse the removal steps, checking the engine/transaxle mounts, attaching the transaxle to the engine, adding fluids, aligning the subframe reference marks, tightening the mounting bolts, reconnecting the negative battery cable, and running the engine to check for proper operation and leaks.
Related 2004 Acura TL Parts
 2004 Acura TL Valve Cover Gasket
 2004 Acura TL Oil Pan
 2004 Acura TL Cylinder Head Gasket
 2004 Acura TL Cylinder Head
 2004 Acura TL Intake Manifold Gasket
 2004 Acura TL Exhaust Manifold Gasket
 2004 Acura TL Camshaft
 2004 Acura TL Crankshaft
 2004 Acura TL Transmission Assembly
 2004 Acura TL Transmission Gasket
 2004 Acura TL Camshaft Seal
 2004 Acura TL Engine Block