×
- Hello
- Login or Register
- Quick Links
- Live Chat
- Track Order
- Parts Availability
- RMA
- Help Center
- Contact Us
- Shop for
- Acura Parts
- Acura Accessories
My Garage
My Account
Cart
Genuine 1986 Acura Legend Engine
- Select Vehicle by Model
- Select Vehicle by VIN
Select Vehicle by Model
orMake
Model
Year
Select Vehicle by VIN
For the most accurate results, select vehicle by your VIN (Vehicle Identification Number).
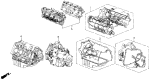
2 Engines found

 Product Specifications
- Other Name: Short Block
- Replaces: 10002-PN5-660
- Item Weight: 146.20 Pounds
- Item Dimensions: 22.4 x 22.2 x 21.2 inches
- Condition: New
- Fitment Type: Direct Replacement
- SKU: 10002-PH7-660
- Warranty: This genuine part is guaranteed by Acura's factory warranty.
 Product Specifications
- Other Name: General Assembly, Cylinder Head
- Replaced by: 10003-PH7-661
- Item Weight: 83.40 Pounds
- Item Dimensions: 26.6 x 18.6 x 9.5 inches
- Condition: New
- Fitment Type: Direct Replacement
- SKU: 10003-PH7-660
- Warranty: This genuine part is guaranteed by Acura's factory warranty.
1986 Acura Legend Engine
If you find yourself requiring new genuine 1986 Acura Legend Engine, consider paying us a visit. We carry a vast inventory of OEM 1986 Acura Legend Engine, offered at highly competitive prices and superior quality, all with a manufacturer's warranty. Additionally, we take pride in our first-class customer service and speedy delivery.
1986 Acura Legend Engine Parts Questions & Experts Answers
- Q: What steps should be taken before starting the procedure for removing and separating the engine on an 1986 Acura Legend?A: Begin with the instructions. Reading them first helps you plan and feel better prepared. We remove the engine and transaxle at the same time and take them apart in the open air. Remove the fuel pressure, disconnect the cable from the battery, vacuum out the tubes to the car filter, and take off the battery box below the hood of an Integra. Cover up your fenders and cowl area, take off the hood, but you can keep the hood partially open if your car is a Legend. For Integras, take out the alternator, distributor, and spark plug wires. First block the rear wheels, then set the parking brake, raise the car on jackstands by hand, remove and drain all types of fluids, and take off the drive belts. For this model type, also take the oil filter and oil cooler off. In all areas, mark and disconnect hoses for vacuum, fuel, coolant, and emissions with tape or a paint sprayer, as well as wiring, ground wires, and gasoline tubes. Capture quick pictures and record where you move brackets and components. First, take off the car's radiator and fan to let trapped gas escape. Pull off the gas cap, and disconnect the fuel tubes running from the engine to the chassis, sealing all loose ends. First, disconnect the control cable to the throttle. Then take off the bolts that hold the power steering pump in place, and rout the pump somewhere nearby without having to unplug any pipe connections. Take the compressor out of its place in air-conditioned vehicles, but leave the refrigerant hoses connected. Get rid of the exhaust pipes from the manifolds, move out the car's axles, cut the wire connections, pull the gear cable, and free the transaxle cables before pulling the engine. Put a lifting sling around the engine brackets, place a hoist under it, connect the sling to the hoist, and tighten the sling until the hoist pulls with light tension. Make sure the only things connecting engine and transmission to the car are the supports and remove those last. Put blocks of wood on the jack's lifting head to protect the transaxle, then remove the engine and transaxle mounts' nuts or bolts. Pull the engine and transaxle out of the car, let the engine turn when needed to move past difficulties, and stop anytime you get stuck on any parts so you can release it. Lift the hoist-restrained engine/transaxle with the vehicle, then carefully lower it down while making sure the transaxle rests securely on the floor or a solid workbench. Take off the engine block-to-transaxle brace, and loosen up the fasteners on the torque converter-to-driveplate for automatic transaxles. Shift the converter back about an inch into the bellhousing. Take off the bolts connecting the engine to the transaxle, and then pull the engine away. Keep the torque converter inside the transaxle when doing this. Either lay the engine on the ground or take off the flywheel/driveplate and put it on a engine cradle. If your engine/transaxle supports show signs of wear or have breaks, replace them now. For all regular manual cars, we must check the clutch parts. For automatic cars, we need to look at both the converter seal and bushing. If your car has a manual transmission, put a drop of heat-resistant grease on the pilot bearing. Also apply grease drops to the nose of the converter and onto the seal lips before placing an automatic transmission model in place. Fit the transaxle gently into place, not using bolts for alignment, to stop damage to main components from cracking. Screw in and make sure the engine and transaxle bolts hold the parts together. Lower the engine and transaxle unit into the car, then bolt the mount into place and make sure everything is tightened. After replacing the parts, put everything back together in the opposite order you took them down, fill all hydraulic fluids, and change the oil filter if required. Turn the engine on and inspect how everything works. Check all leaked fluids after the engine shuts down.
Related 1986 Acura Legend Parts
 1986 Acura Legend Valve Cover Gasket
 1986 Acura Legend Cylinder Head Gasket
 1986 Acura Legend Crankshaft
 1986 Acura Legend Transmission Gasket
 1986 Acura Legend Camshaft Seal
 1986 Acura Legend Engine Block
 1986 Acura Legend Camshaft
 1986 Acura Legend Cylinder Head
 1986 Acura Legend Exhaust Manifold Gasket
 1986 Acura Legend Intake Manifold Gasket
 1986 Acura Legend Oil Pan
 1986 Acura Legend Transmission Assembly