×
- Hello
- Login or Register
- Quick Links
- Live Chat
- Track Order
- Parts Availability
- RMA
- Help Center
- Contact Us
- Shop for
- Acura Parts
- Acura Accessories
My Garage
My Account
Cart
Genuine Acura TL Back Up Light Switch
Reverse Light Switch- Select Vehicle by Model
- Select Vehicle by VIN
Select Vehicle by Model
orMake
Model
Year
Select Vehicle by VIN
For the most accurate results, select vehicle by your VIN (Vehicle Identification Number).
2 Back Up Light Switches found


Acura TL Back Light Switch Assembly (Gray)
Part Number: 28700-PHR-003$49.07 MSRP: $68.43You Save: $19.36 (29%)Ships in 1-3 Business Days
Acura TL Back Up Light Switch (Black) (U-Shin)
Part Number: 28700-PWL-013$49.07 MSRP: $68.43You Save: $19.36 (29%)Ships in 1-3 Business Days
Acura TL Back Up Light Switch
Using the Acura TL Back Up Light Switch allows your car to illuminate the reverse lamps automatically, which informs drivers behind you of your reverse action. When the transmission selector is placed in the reverse position, the Back Up Light Switch closes its circuit for safety communication during all reverse maneuvers. Over the production years, depending on trim and gearbox, the switch on an Acura TL may be mounted on the transmission case, in the floor console linkage, or on the steering column. Manual gearboxes typically rely on a mechanical plunger style Back Up Light Switch that is pressed by an internal cam, while automatic versions often integrate the Back Up Light Switch into the neutral safety assembly, combining reverse lighting with start in park protection. Some designs trigger via direct mechanical interaction, while other designs use a small hydraulic pressure sensor. Regardless of the system in question, all Acura TL systems perform the same function, namely close a circuit to send power to the bulbs as soon as reverse is selected. The Back Up Light Switch experiences low current and few moving parts, which means replacement is fast and restores full function. In fact, this switch helps ensure the Acura TL's back up lights are lit and working safely.
We provide a broad range of OEM Acura TL Back Up Light Switch at unbeatable prices on our website. For your OEM parts, You can count on the guaranteed quality, manufacturer's warranty, outstanding customer service, and prompt delivery. We look forward to your visit.
Acura TL Back Up Light Switch Parts Questions & Experts Answers
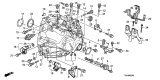
- Q: How to Test and Replace the Back Up Light Switch on an Acura TL?A:Before testing the back-up light switch, check the fuse in the engine compartment fuse/relay box. Put the shift lever in Reverse and turn the ignition switch to the On position; the back-up lights should illuminate, then turn off the ignition switch. If the back-up lights do not activate, inspect the back-up light bulbs in the tail light assembly. If both the fuse and bulbs are functional, locate the back-up light switch on top of the transaxle, under the lifting hook, and for access, remove the air intake duct and the air filter housing and resonator. Next, remove the battery and the battery tray. Trace the leads back to the back-up light switch electrical connector, unplug it, and connect an ohmmeter or continuity tester across the terminals of the back-up light switch. With the shift lever in Reverse, continuity should be present; with the shifter in any other gear, continuity should not exist. If the switch fails this test, it needs to be replaced. If the switch is operational but the back-up lights are still not functioning, check for power to the switch. If voltage is absent, trace the circuit between the switch and the fuse block. If power is present, trace the circuit between the switch and the back-up lights for any open circuit condition. To replace the switch, unplug the electrical connector, unscrew the back-up light switch, and install the new switch using a new O-ring. Some models require RTV sealant to seal the switch; in such cases, clean the threaded hole of old sealant, apply new sealant to the new switch, and install it within five minutes of applying the RTV. Finally, plug in the connector.
")
Related Acura TL Parts
 Acura TL Brake Light Switch
 Acura TL Oil Pressure Switch
 Acura TL Headlight Switch
 Acura TL Door Jamb Switch
 Acura TL Mirror Switch
 Acura TL Wiper Switch
 Acura TL Seat Switch
 Acura TL Neutral Safety Switch
 Acura TL Turn Signal Switch
 Acura TL Seat Heater Switch
 Acura TL Power Steering Pressure Switch