×
- Hello
- Login or Register
- Quick Links
- Live Chat
- Track Order
- Parts Availability
- RMA
- Help Center
- Contact Us
- Shop for
- Acura Parts
- Acura Accessories
My Garage
My Account
Cart
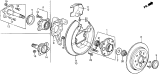
Genuine Acura Integra Brake Disc
Disc Rotor- Select Vehicle by Model
- Select Vehicle by VIN
Select Vehicle by Model
orMake
Model
Year
Select Vehicle by VIN
For the most accurate results, select vehicle by your VIN (Vehicle Identification Number).
11 Brake Discs found


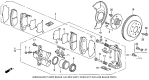
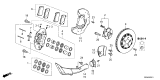
Acura Integra Front Brake Disk
Part Number: 45251-SCC-901$91.67 MSRP: $128.60You Save: $36.93 (29%)Ships in 1-3 Business Days


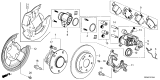
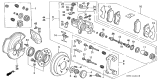
Acura Integra Rear Brake Disk
Part Number: 42510-T38-A00$92.03 MSRP: $129.12You Save: $37.09 (29%)Ships in 1-3 Business Days
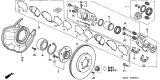
Acura Integra Rear Brake Disk
Part Number: 42510-SR3-A11$91.67 MSRP: $128.60You Save: $36.93 (29%)Ships in 1-3 Business Days
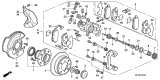
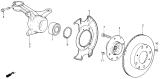
Acura Integra Front Brake Disk
Part Number: 45251-TVC-A00$92.11 MSRP: $129.22You Save: $37.11 (29%)Ships in 1-3 Business Days
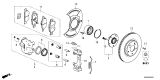
Acura Integra Front Brake Disk
Part Number: 45251-TGH-A01$355.28 MSRP: $507.40You Save: $152.12 (30%)Ships in 1-2 Business Days
Acura Integra Rear Brake Disk
Part Number: 42510-TGH-A00$91.67 MSRP: $128.60You Save: $36.93 (29%)Ships in 1-2 Business Days


Acura Integra Brake Disc
The Brake Disc found in Acuara Integra automobiles plays a significant part of the braking system on account of this, it is responsible for enabling brake pads to make friction, where kinetic energy is transformed to heat. Made of heavy steel in most frequencies, these rotors are intended to have thermal shock protection and heat loss features. Contemporary Acura Integra Brake Discs are usually drilled, its internal surfaces being incased in slots responsible for the flow of air as the brake rotates, encouraging fast heat dissipation and making it more unlikely to overheat. Different types of Brake Rotors have been used in Integra models in the past, some of them are drilled, slotted, which enhance heat dissipation and water shedding. As with the previous deviations, these variations can bring performance benefits, but they are likely to add to the pad wearing process. It is important because of such problems as Warping, cracking, rusting affect the braking system and thus need regular check up and changing to enhance its performance.
We provide a broad range of OEM Acura Integra Brake Disc at unbeatable prices on our website. For your OEM parts, You can count on the guaranteed quality, manufacturer's warranty, outstanding customer service, and prompt delivery. We look forward to your visit.
Acura Integra Brake Disc Parts Questions & Experts Answers
- Q: How to Replace Brake Discs on an Acura Integra?A:This procedure is applicable to both front and, if applicable, rear brake discs. Begin by loosening wheel lug nuts, raising and securely supporting the vehicle on jackstands, and installing the lug nuts with washers to hold the disc in place or use disc retaining screws if present; for rear discs, release the parking brake. Remove the Brake Caliper without disconnecting the brake hose, suspend it with wire, and inspect the disc surface for scoring or damage. Check both sides of the disc for light scratches or deep grooves; deep scoring requires machining or replacement. To check disc runout, place a dial indicator about 1/2-inch from the disc's outer edge, set the indicator to zero, rotate the disc, and ensure the reading doesn't exceed allowable runout limit. If necessary, have the disc refinished at an automotive machine shop. The minimum wear thickness is stamped on the disc; check with a micrometer. For removal, remove caliper mounting bracket-to-steering knuckle bolts or, for rear calipers, bracket-to-trailing arm bolts, and the bracket; remove lug nuts or disc retaining screws and the disc from the hub, using bolts if stuck. During installation, place the disc over the threaded studs, install disc retaining screws, caliper mounting bracket, brake pads, and caliper over the disc, then tighten bolts. Install the wheel and lug nuts, lower the vehicle, tighten lug nuts, depress the brake pedal to bring the brake pads in contact with the disc, and check brake operation carefully before normal use.

Related Acura Integra Parts
 Acura Integra Brake Pad Set
 Acura Integra Speed Sensor
 Acura Integra Brake Line
 Acura Integra Parking Brake Cable
 Acura Integra Brake Master Cylinder
 Acura Integra ABS Control Module
 Acura Integra Brake Booster
Browse by Year
2026 Brake Disc 2025 Brake Disc 2024 Brake Disc 2023 Brake Disc 2001 Brake Disc 2000 Brake Disc 1999 Brake Disc 1998 Brake Disc 1997 Brake Disc 1996 Brake Disc 1995 Brake Disc 1994 Brake Disc 1993 Brake Disc 1992 Brake Disc 1991 Brake Disc 1990 Brake Disc 1989 Brake Disc 1988 Brake Disc 1987 Brake Disc 1986 Brake Disc