- Hello
- Login or Register
- Quick Links
- Live Chat
- Track Order
- Parts Availability
- RMA
- Help Center
- Contact Us
- Shop for
- Acura Parts
- Acura Accessories

Why choose AcuraPartsWarehouse
- Superb Shopping Experience
To keep your car running at peak performance, you need genuine parts from AcuraPartsWarehouse.com. For years, we've been the leading online Acura Integra parts store. All purchases through AcuraPartsWarehouse.com are secure as everything is expedited directly from committed dealers and backed by the manufacturer's warranty.
- Optimal Customer Service
What makes AcuraPartsWarehouse.com the best choice for Acura Integra OEM parts? Live customer service representatives are standing by to help through email, live chat, or phone calls. Our experienced customer support team strives to provide you with the best possible shopping experience.
- Quick Delivery
Restore your Acura Integra to its original condition with ease as all the parts on AcuraPartsWarehouse.com are on hand and ready to ship once your order has been made. You'll receive your order at the doorstep in a matter of days as we deliver from numerous strategic locations across the US.
Popular Genuine Acura Integra Parts
- Engine Parts View More >
- Electrical / Exhaust / Heater / Fuel Parts View More >
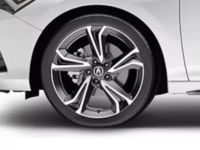
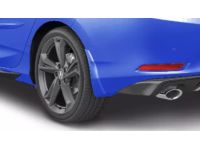
- Chassis Parts View More >
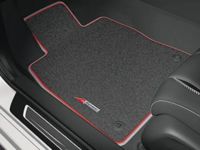
- Interior / Bumper Parts View More >
- Body / Air Conditioning Parts View More >
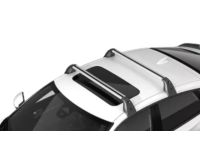
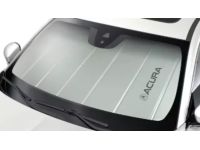
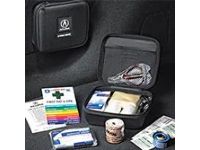
- Accessories View More >


Shop Genuine Acura Integra Parts with AcuraPartsWarehouse.com
The Acura Integra is a renowned model manufactured by Honda, a Japanese automaker, from 1985 to 2006. Over its five generations, the Integra evolved into a luxury, sport-oriented derivative of the Honda Civic. The model was one of the launch vehicles for the Acura brand in the US in 1986, alongside the Acura Legend. The Integra, particularly its DC2 Integra Type R from 1995-2001, is often recognized as one of the best front-wheel-drive cars ever built, featuring six times in Car and Driver magazine's annual "Ten Best" list. In 2021, the Acura Integra made a comeback. The first-generation Integra, debuting in Japan in 1985, was initially only available as a three-door liftback, with a five-door variant introduced later in the year. For the European market, the Integra was positioned downmarket and equipped with a 1.6-liter DOHC 16-valve 4-cylinder (D16A1) engine. In 1989, the second-generation Integra was introduced, featuring the first VTEC engine, producing a specific power output of 160 PS for North America. This generation phased out the 5-door liftback, and a new hardtop body style was introduced, keeping up with the popular entry-level sedan trend in Japan. The third generation, revealed in 1993, increased the standard power to 187 hp and featured models like LS, SE, and GS. Over the years, Acura concentrated on enhancing the Integra's performance, leading up to the announcement of the 2023 version equipped with advanced technology. The enduring legacy of the Acura Integra is a testament to its continual evolution and commitment to performance and luxury.
As with any vehicle, the Acura Integra will experience wear and tear over time, so it is crucial to address common problems early on. Engine issues can be identified through signs like abnormal rattling noises, white or grey oil smoke, an illuminated Check Engine Light, higher operating temperatures, dropped oil pressure, oil leaks, and reduced performance such as lack of acceleration power, misfiring, or backfiring. These symptoms suggest that the oil pump, oil pan gasket, oil pan, timing belt, piston ring set, oil filter, and radiator hose require maintenance. Another common issue involves the transmission and suspension systems. Transmission failure is often resolved by replacing the pilot bearing, while sluggish handling and rattling or squeaking noises while driving may be caused by a faulty sway bar link bushing. To keep a vehicle in optimal condition, all auto parts need special care. For instance, the water pump and thermostat, both vital for maintaining engine temperature, should be checked and maintained regularly.
Choosing OEM parts guarantees top-tier quality and durability. They are carefully designed to adhere to the strict specifications of the official factory and undergo thorough quality control inspections during production, ensuring long-lasting resilience and an impeccable fit. Are you in search of superior quality and reasonably priced OEM Acura Integra parts, such as Transmission - Automatic, Transmission - Manual? You've landed at the perfect online store. We provide all parts at the most competitive prices in the market, even outdoing inexpensive aftermarket auto parts. Furthermore, we guarantee that you'll receive genuine Acura Integra parts covered by the manufacturer's warranty, delivered at the fastest possible speed. Our professional customer service team is always on hand to assist with any issues during your shopping experience. Enjoy your shopping journey with us!
Acura Integra Parts Questions & Answers
- Q: How to Replace a Brake Caliper on an Acura Integra?A:To replace the brake disc, loosen the lug nuts on the front or rear wheels, remove the wheels, and disconnect the brake line. Next, plug the brake line banjo fitting with a short piece of rubber hose, and remove the caliper. To install, install the caliper, replace the sealing washers, bleed the brake system, install the wheels, hand tighten the wheel lug nuts, remove the safety stands and lower the vehicle, and finally tighten the wheel lug nuts.
- Q: How to Remove and Install a Tie Rod End on an Acura Integra?A:Untighten the wheel lug nuts, lift the vehicle, support it firmly on jackstands, and remove the wheel. Hold the tie-rod end with a wrench, loosen the jam nut, and mark the tie-rod end position. Remove the cotter pin and loosen the tie-rod end stud nut. Separate the tie-rod from the steering knuckle arm with a puller and unscrew the tie-rod end. To install, thread the tie-rod end to the marked position. Insert the stud into the steering knuckle arm. Install nut and pin, then tighten the jam nut and install wheel and lug nuts. Lower the vehicle and tighten the nuts.
- Q: How to Remove and Install a Power Steering Pump on an Acura Integra?A:Disconnect the cable from the negative battery terminal, then disconnect the positive battery cable. Caution: If the stereo in your vehicle is equipped with an anti-theft system, make sure you have the correct activation code before disconnecting the battery. Disconnect the fluid hoses at the pump, noting the difference between the pressure and the return hoses; the return hose is held to the pump with a spring type clamp, and the pressure line has two bolts holding it to the pump body. Cap or plug both hoses to prevent leakage or contamination. Install a new O-ring on the end of the pressure line. Remove the pump adjusting bolt and the pump mounting bolt(s) and remove the pump from the engine. Installation is the reverse of removal. Be sure to adjust the drivebelt tension and bleed the power steering system.


")