×
- Hello
- Login or Register
- Quick Links
- Live Chat
- Track Order
- Parts Availability
- RMA
- Help Center
- Contact Us
- Shop for
- Acura Parts
- Acura Accessories
My Garage
My Account
Cart
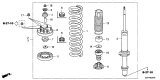
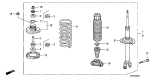
Genuine Acura TL Shock Absorber
Suspension Shock Absorber- Select Vehicle by Model
- Select Vehicle by VIN
Select Vehicle by Model
orMake
Model
Year
Select Vehicle by VIN
For the most accurate results, select vehicle by your VIN (Vehicle Identification Number).
71 Shock Absorbers found


Acura TL Shock Absorber Unit, Front
Part Number: 51605-SEP-A04$160.70 MSRP: $226.98You Save: $66.28 (30%)Ships in 1-3 Business Days

Acura TL Right Front Shock Absorber Unit
Part Number: 51611-TK5-A03$181.78 MSRP: $259.62You Save: $77.84 (30%)Ships in 1-3 Business Days
Acura TL Left Front Shock Absorber Unit
Part Number: 51621-TK4-A03$181.88 MSRP: $259.75You Save: $77.87 (30%)Ships in 1-3 Business Days
Acura TL Shock Absorber Unit, Left Front
Part Number: 51621-TK5-A03$181.78 MSRP: $259.62You Save: $77.84 (30%)Ships in 1-3 Business Days


Acura TL Rear Shock Absorber Unit
Part Number: 52611-S0K-A02$190.27 MSRP: $267.55You Save: $77.28 (29%)Ships in 1-2 Business Days


Acura TL Shock Absorber Unit, Rear
Part Number: 52611-SEP-A04$155.96 MSRP: $220.28You Save: $64.32 (30%)Ships in 1-3 Business Days
Acura TL Rear Shock Absorber Strut
Part Number: 52611-SEP-A06$176.52 MSRP: $252.10You Save: $75.58 (30%)Ships in 1-3 Business Days

Acura TL Right Front Shock Absorber Unit
Part Number: 51605-S0K-A52$161.19 MSRP: $226.98You Save: $65.79 (29%)Ships in 1-2 Business DaysAcura TL Front Shock Absorber Unit
Part Number: 51605-SEP-A16$173.98 MSRP: $245.73You Save: $71.75 (30%)Ships in 1-3 Business DaysAcura TL Front Strut Assembly
Part Number: 51605-SEP-A11$161.70 MSRP: $196.00You Save: $34.30 (18%)Ships in 1-2 Business Days
Acura TL Left Front Shock Absorber Assembly
Part Number: 51602-SEP-A31$237.01 MSRP: $381.88You Save: $144.87 (38%)Ships in 1-2 Business Days
Acura TL Rear Shock Absorber Assembly
Part Number: 52610-SEP-A13$451.89 MSRP: $635.45You Save: $183.56 (29%)Ships in 1-2 Business Days
Acura TL Shock Absorber Unit, Rear
Part Number: 52611-TK4-A02$184.62 MSRP: $263.67You Save: $79.05 (30%)Ships in 1-3 Business Days
Acura TL Right Front Shock Absorber Unit
Part Number: 51605-S0K-A04$161.70 MSRP: $196.00You Save: $34.30 (18%)Ships in 1-2 Business DaysAcura TL Left Front Shock Absorber Unit
Part Number: 51606-S0K-A03$155.34 MSRP: $218.42You Save: $63.08 (29%)Ships in 1-2 Business DaysAcura TL Right Front Shock Absorber Unit
Part Number: 51611-TK5-A52$181.67 MSRP: $259.45You Save: $77.78 (30%)Ships in 1-3 Business DaysAcura TL Left Front Shock Absorber And Strut Unit
Part Number: 51621-TK5-A52$187.23 MSRP: $267.40You Save: $80.17 (30%)Ships in 1-3 Business DaysAcura TL Rear Shock Absorber Assembly
Part Number: 52610-SEP-A14$315.50 MSRP: $635.45You Save: $319.95 (51%)Ships in 1-2 Business Days


Acura TL Left Front Shock Absorber Assembly
Part Number: 51602-SEP-A42$239.97 MSRP: $342.71You Save: $102.74 (30%)
| Page 1 of 4 |Next >
1-20 of 71 Results
Acura TL Shock Absorber
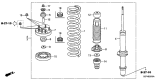
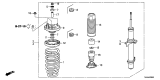
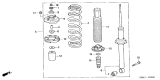
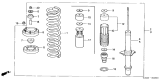
The Acura TL Shock Absorber is responsible for keeping the sedan steady by smoothing out bumps and controlling body motion. Mounted next to the coil spring or as part of a strut assembly, the Shock Absorber converts the suspension movement into heat via a piston moving hydraulic fluid and prevents the car from bouncing, diving, or rolling. Across the TL line, twin-tube hydraulic dampers have been applied as the standard Shock Absorber, occasionally pressurized with nitrogen gas to reduce foaming and maintain comfort in day-to-day driving. Performance-oriented versions have upgraded to mono-tube units going down a Shock Absorber style with a larger piston and separate gas chamber for faster heat shedding for crisper handling. Both types have the same intention, but the mono-tube makes the Acura driver experience a more uniform damping force during spirited driving, while the twin-tube is suitable for routine driving. Front strut assemblies on every Acura TL combine the Shock Absorber with a coil spring seat and upper mount so that replacement of a complete unit refreshes worn bearings, rubber insulators, and the spring itself in a single step. Regular inspection around 50,000 miles helps Acura owners spot leaks, harsh ride, or cupped tires that are indicative of a tired damper before it compromises TL stability.
We provide a broad range of OEM Acura TL Shock Absorber at unbeatable prices on our website. For your OEM parts, You can count on the guaranteed quality, manufacturer's warranty, outstanding customer service, and prompt delivery. We look forward to your visit.
Acura TL Shock Absorber Parts Questions & Experts Answers
- Q: How to remove and install the front shock absorber and Coil Springs on Acura TL?A:For 2004 and later remove the right side engine cover, right and left rear engine covers, and strut brace on the ground keeping the vehicle on the ground. Then remove the wheel, loosen the wheel lug nuts, raise the vehicle up (you'll need to) and securely support on jack stands. Spread some engine oil around the rubber o-ring sealing the shaft and support the lower Control Arm using a floor jack, then remove the damper fork-to-shock absorber pinch bolt and the damper fork-to-lower control arm bolt to pry the fork away from the shock absorber using a gentle tap if required. Remove the upper mounting nuts while an assistant supports the shock absorber and coil spring assembly, and carefully work the unit out from the fenderwell. Install shock absorber assembly with assistance in fenderwell, then guide back into fenderwell and insert upper-mounting studs through body holes, loosely installing nuts to hold in place. Position the lower end of the shock absorber into the damper fork, feed the aligning tab into the slot and attach the damper fork to the lower control arm with a fresh damper fork nut on the damper fork bolt. Put the floor jack under the lower control arm as if it were at normal ride height, tighten the damper fork pinch bolt and damper fork to lower control, arm bolts/nut to the specified torque, and remove the floor jack. Lower the vehicle, install the wheel, and lug nuts and tighten the lug nuts to the specified torque. Lastly, reinstall the engine covers and engine strut brace and tighten up all the upper mounting nuts to the specified torque.

Related Acura TL Parts
 Acura TL Tie Rod End
 Acura TL Coil Springs
 Acura TL Steering Knuckle
 Acura TL Fender
 Acura TL Wheelhouse
Browse by Year
2014 Shock Absorber 2013 Shock Absorber 2012 Shock Absorber 2011 Shock Absorber 2010 Shock Absorber 2009 Shock Absorber 2008 Shock Absorber 2007 Shock Absorber 2006 Shock Absorber 2005 Shock Absorber 2004 Shock Absorber 2003 Shock Absorber 2002 Shock Absorber 2001 Shock Absorber 2000 Shock Absorber 1999 Shock Absorber 1998 Shock Absorber 1997 Shock Absorber 1996 Shock Absorber 1995 Shock Absorber