×
- Hello
- Login or Register
- Quick Links
- Live Chat
- Track Order
- Parts Availability
- RMA
- Help Center
- Contact Us
- Shop for
- Acura Parts
- Acura Accessories
My Garage
My Account
Cart
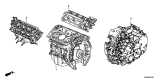
Genuine Acura Transmission Assembly
Trans Assembly- Select Vehicle by Model
- Select Vehicle by VIN
Select Vehicle by Model
orMake
Model
Year
Select Vehicle by VIN
For the most accurate results, select vehicle by your VIN (Vehicle Identification Number).
250 Transmission Assemblies found

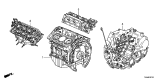
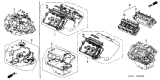
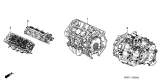
Acura Transmission Assembly
Part Number: 06202-R8B-000$3723.02 MSRP: $5317.08You Save: $1594.06 (30%)Ships in 1-3 Business DaysProduct Specifications- Other Name: Transaxle
- Replaces: 20021-R8B-000, 20021-R8B-010

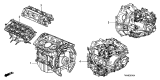
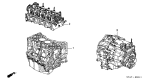
Acura Transmission Assembly
Part Number: 20021-RK3-000$4142.72 MSRP: $6278.11You Save: $2135.39 (35%)Ships in 1-2 Business DaysProduct Specifications- Other Name: Transaxle

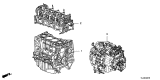
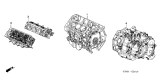
Acura Automatic Transmission Assembly
Part Number: 20021-RDH-000$2678.41 MSRP: $4059.01You Save: $1380.60 (35%)Ships in 1-2 Business DaysProduct Specifications- Other Name: Transmission Assembly (At)

Acura Transmission Assembly
Part Number: 20021-RWE-000$4650.71 MSRP: $7047.94You Save: $2397.23 (35%)Ships in 1-2 Business DaysProduct Specifications- Other Name: Transaxle
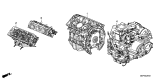
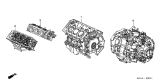
Acura Transmission Assembly
Part Number: 06202-R8C-000$3465.74 MSRP: $4949.64You Save: $1483.90 (30%)Ships in 1-3 Business DaysProduct Specifications- Other Name: Transaxle
- Replaces: 20021-R8C-010, 20021-R8C-000

Acura Automatic Transmission Assembly
Part Number: 06202-5J8-A00$7482.57 MSRP: $10686.33You Save: $3203.76 (30%)Ships in 1-3 Business DaysProduct Specifications- Other Name: Transaxle
- Replaces: 06202-5J8-000, 20021-5J8-000, 20021-5J8-A00, 20021-5J8-020, 20021-5J8-A03, 20021-5J8-A02, 20021-5J8-030

Acura Bare Transmission Assembly
Part Number: 20010-PR8-A00$14637.46 MSRP: $19296.63You Save: $4659.17 (25%)Ships in 1-3 Business DaysProduct Specifications- Replaces: 20011-PR8-A00

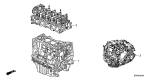
Acura Transmission Assembly
Part Number: 20011-RK6-M81$10448.94 MSRP: $16124.90You Save: $5675.96 (36%)Ships in 1-2 Business DaysProduct Specifications- Other Name: Transaxle
- Replaces: 20011-RK6-M80

Acura Transmission Assembly,Bare
Part Number: 20021-R8S-A00$4804.71 MSRP: $7281.32You Save: $2476.61 (35%)Ships in 1-2 Business DaysProduct Specifications- Other Name: Transaxle
Acura Transmission Assembly
Part Number: 20021-RWE-L10$4892.55 MSRP: $7414.43You Save: $2521.88 (35%)Ships in 1-2 Business DaysProduct Specifications- Other Name: Transaxle


Acura Transmission Assembly, Automatic (4Wd)
Part Number: 1-87992-879-0$4879.52 MSRP: $6968.75You Save: $2089.23 (30%)Ships in 1-3 Business DaysProduct Specifications- Replaced by: 2-90241-700-0
 Product Specifications
- Other Name: Transmission Assembly (At)


 Product Specifications
- Other Name: Transaxle
- Product Specifications
- Other Name: Transaxle
- Product Specifications
- Other Name: Transaxle
- Product Specifications
- Other Name: Transaxle
- Replaces: 20011-RDE-B61, 20011-RDE-B60

 Product Specifications
- Replaces: 20011-PPT-335
- Product Specifications
- Other Name: Transaxle

 Product Specifications
- Other Name: Transaxle
- Replaces: 20011-PYZ-C60, 20011-PYZ-C61
| Page 1 of 13 |Next >
1-20 of 250 Results
Acura Transmission Assembly Parts Questions & Experts Answers
- Q: Is a Transmission Assembly Overhaul a Challenging Task for a Do-It-Yourselfer on an Acura Integra?A:Overhauling a manual transaxle is a challenging task for a do-it-yourselfer, requiring the disassembly and reassembly of numerous small parts, with precise measurements of clearances and potential adjustments using select fit spacers and snap-rings. While a competent individual can remove and install the transaxle, the overhaul process is best left to a repair shop, as the time and cost involved often surpass that of a rebuilt unit, which may be available through dealer parts departments or auto parts stores. An inexperienced mechanic can successfully rebuild a transaxle if equipped with the necessary special tools and approaches the job methodically to avoid overlooking any details. Essential tools for the overhaul include internal and external snap-ring pliers, a bearing puller, a slide hammer, a set of pin punches, a dial indicator, and possibly a hydraulic press, along with a sturdy workbench and a vise or transaxle stand. Careful documentation during disassembly is crucial, noting the arrangement and securing methods of each piece to facilitate reassembly. Additionally, having an understanding of the malfunctioning area of the transaxle can simplify the examination and replacement of components, as certain issues are often linked to specific regions within the unit.
- Q: How tossues with a Transmission Assembly be diagnosed before considering repairs on an Acura MDX?A:It's important to determine whether a fault is electrical, mechanical or hydraulic before repairs can begin in the event of a problem. In addition, diagnosis needs much information about how it actually operates and what comprising it and also specialized test devices are needed hence making it complex. As a result, whenever there is an issue with the automatic transaxle, it must be referred to the dealer's service department or other competent repair facility concerned. It should be noted that until a professional mechanic understands all the transaxle's problems using appropriate tools, you should not get rid of a defective transaxle; for this reason, troubleshooting has to occur with the vehicle having its transaxle still in place.
- Q: How to remove and install a Transmission Assembly on a manual transaxle on Acura TL?A:First you remove the air intake duct, air filter housing and resonator; the engine compartment covers if present and the strut brace; then you remove the transaxle. Next, pull the battery, battery tray and the clutch release cylider and hydraulic line from the car with pulling the line but not releasing fittings, supporting the cylider with wire or rope. Marking vacuum lines, emissions hoses, electrical connectors and wiring harness clamps that may block the transaxle removal with masking tape, or use a touch up paint applicator. Take the cover off the radiator and remove the upper transmission to engine bolts. Connect the sling or chain to the left end of the engine and support the engine with an engine support fixture or hoist. Loosen BOTH driveaxle/hub nuts, loosen front wheel lug nuts, safely jack the vehicle and remove wheels. Remove the engine splash shield and inner fender splash shields, cowl (cowl and sports cowl can use pads or blankets, fenders generate more heat; cowl covers are not necessary here but a pad or blanket will be needed later on due to the time element). Remove the front section of the exhaust pipe, drain the transaxle fluid and disconnect drive axles and intermediate shaft. Remove all powertrain mounts, take out the subframe, disconnect shift cables from the transaxle. Once the car has been safely supported by a jack, with straps or chains wrapped at the transaxle to stabilise it, remove the lower transaxle to engine bolts. Lower the transaxle away from the engine to disconnect input shaft from clutch disc and then move it away from the vehicle. If the clutch components were removed, for installation, reinstall and verify the dowel pins are in place. Set the transaxle on its port side, raise the transaxle to the jack, and slide it forward hooking the dowel pins in and the input shaft. Second, install and tighten the transaxle to engine bolts, remove and install in reverse and, between these, refill the transaxle with the specified lubricant, tighten the driveaxle/hub nuts and wheel lug nuts to the correct torque and road test for operation and check for leaks.
")


Related Acura Parts


Browse by Model
ADX Transmission Assembly CL Transmission Assembly ILX Hybrid Transmission Assembly ILX Transmission Assembly Integra Transmission Assembly Legend Transmission Assembly MDX Transmission Assembly NSX Transmission Assembly RDX Transmission Assembly RL Transmission Assembly RLX Transmission Assembly RSX Transmission Assembly SLX Transmission Assembly TL Transmission Assembly TLX Transmission Assembly TSX Transmission Assembly Vigor Transmission Assembly ZDX Transmission Assembly